
DREAMBOX
7000s

FEATURES/SPECIFICATIONS
- 250 MHz IBM PowerPC Processor (350 Mips)
 - Linux open source (most parts under the terms of GPL, accordingly
   expandable)- Supports Linux Standard API (Direct-FB, Linux-FB, LIRC)
- 1 x DVB Common-Interface Slot
- 2 x Smart card-Reader (dreamcrypt)
- Integrated Compact Flash Interface Slot
- MPEG2 Hardware decoding (fully DVB compliant)
- in future Support for MPEG4 decoding
- Common available NIMs (DVB-S, DVB-T, DVB-C)
- 100 MBit full duplex Ethernet Interface
- USB Port For : Keyboard, Pointing Devices, Web Cams and other devices
- V.24/RS232 Interface
- Big-size LCD-Display
- Up to 64 MByte of RAM
- integrated IDE UDMA66 Master/Slave Interface
- Support for internal HDD in any capacity
- unlimited channel lists for TV/Radio
- channel-change time < 1 second
- full automatic service scan
- supports directly bouquet-lists (indirect unlimited)
- supports EPG (electronic program guide)
- supports videotext (insertion)
- various applications such Web-Browser or Mail-clients
- supports multiple LNB-Switching control (supports DiSEqC)
- fully adaptable OSD in many languages (skin-support)
- SPDI/F Interface for digital bit stream out (AC-3 / DTS)
- 2 x Scart -interfaces (fully controlled by software)
 - MINI-DIN connector for extern IR (send/receive) and I2C for
   extern Rotor devices
- intern send/receive IR (Video recorder)
LOADING NEW IMAGES TO DREAMBOX .
There are actually two ways of loading new image files in your dreambox 7000s . The point you have to take in mind though is how
often do you intend to use one of those tools ... But if we just take a look at the pace of new images presented, -almost one new image
within two weeks- then i guess you have to use the most fast one ... So lets take a look first at the faster tool the DreamUpLAN .
It's a very simple tool using your dreambox's 100 MBit full duplex Ethernet Interface . You actually press two or three buttons and you've got you job done !
We assume that you already have configured your network settings , so you place in the top box area the address of your dreambox which in my case if you take a look was 100.100.100.1 , and that you are connected to your dreambox via a cross cable ( pc directly to dreambox ) or thru a local network via a hub box .
Press button QUICK FLASH and go for the file directory where you have saved your images . Select the one you want to upload to dreambox and press open .
As soon as you press "open" the DreamUpLan will attempt to connect to your dreambox , and if network is configured correctly the procedure will start , and you'll get the next messages on DreamUpLan .
At this point , pressing the OK button erases completely the software you used to have in your dreambox .
Erasing starts after the OK button .
When erasing is complete , programing of the new image is followed . Usually one minute time will be more than enough for the DreamUpLan to finish.
If nothing went wrong your new s/w is allready in the flashrom .
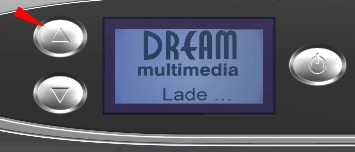
Exit DreamUpLan and reboot your dreambox . When first logo screen of your new s/w appears dont forget to press and hold left upper button of Dreamboxe's front panel until "flash erase" appears in front display .
-------------------------------
© Dreambox and logo's are copyright protected by Dream-Multimedia-tv.